Monday 31 March 2014

FREE YOUR IMAGINATION BY CATHI


Hi! Cathi back again this week with another layout!! This layout features the gorgeous Molossi chipboards and Manor House Flowers.


Here you can see the gorgeous dark pink Vine and pink Minuette flowers from Manor House Creations.


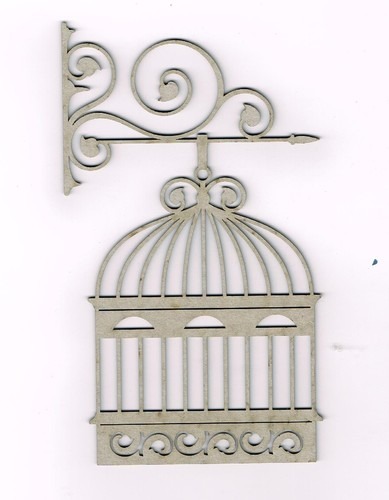
I chose the Molossi Birdcage #4 for this layout, I just love the detail on it. I colored it using Heart Art Anthology mist.

 Birdcage # 4 Vine - dark pink  Minuettes - Pink mix

Photobucket

Friday 28 March 2014

HOW MUCH IS TOO MUCH?

Hi, Rikki here to share with you a layout that I love and now is apart of my scrap wall display. Its not my usually arty or fussy cut layouts but it has an elegance to it that I just love ( well at least I think it does). 

You sometimes don't need a heap of embellishments to show case you photo, so how do you know how much is too much?


The first thing I started with, for this layout was the Manorhouse Creations  Vine. I love the vines because you can shape them in the direction that you need them to go. I wanted a semi circle shape to wrap around my photo.


The next step; I wanted to add some bulk to the Vine and some contrast. So from another packet of Manorhouse Creations flowers I used white as the contrast colour to tie my light house to the layout. Then I used a couple of  Manorhouse Creations Teeny Weenies Roses through the spray of flowers (its all about the finishing touches).


When mounting a photo on some background paper I don't always want the bulk from foam mount especially when I have a vine on the layout. To add layers and depth I use one piece of double sided tape and a stapler, this allows you to curl the edges of your pattern papers = instant depth in your layers.


For the title I wanted my Kaisercraft rub on to take a more aged look.... when you rub it on move the top layer a little bit it will make it crack and give you this worn look. 

For the finishing piece for the layout , I wanted some movement, this is where the beautiful Flourish With A Bling  Chloe pearl flourish was perfect for that, it was like a wave!!! It tied in with the picture of the lighthouse. These flourishes are really easy to put down and you can cut them to customize them with  your page.

And thats it the page for me is finished, anymore embellishments would have been too much..... Time to step away from the layout and admire it.


Vine - light blue
Vine - light blueTeeny weenies roses 36pcs
Teeny weenies roses 36pcs
Explore Rubon Word
Explore Rubon Word
FWAB Chloe Pearl Flourish Blue

I hope you enjoyed my post today, and that you can go into your stash and create a timeless layout or better still why dont you pop over to the Molossi store and grab yourself some of these yummy embellishments.

Rikki xxxx
Photobucket

Wednesday 26 March 2014

KAISERCRAFT - BASE COAT


Hi, it's Honor here and today I'm sharing a card I've made from Kaisercraft's "Base Coat" collection, showing you that you can make a card from just one piece of paper.
 
The base of the card is brown cardstock, and the remainder of the card is made from Kaisercraft's Base Coat "Whitewash".  I've used both sides of the paper, and layered the card, distressing the edges.  This paper is so versatile, and makes great male cards, that I sometimes struggle with.
 
The paper string is from Green Tara, and Flourish With A Bling is Pewter "Grace".
 
The metal flower and leaf is from my stash, and suited the paper perfectly.
 
Thanks for stopping by,
Honor xo
 

Photobucket

Monday 24 March 2014

MAKING COSTUMES FOR ALICE BY CATHI


My daughter is very excited about being Alice in her ballet school's upcoming show Alice in Wonderland next month!! She is as we speak in a 3 hour rehearsal and she is loving the extra dancing!! She wasn't loving so much being the dress form for mommy when I was helping make some costumes for the younger dancers! I managed to make 8 very basic playing card costumes to help out...a job my dress form daughter had volunteered me for lol!


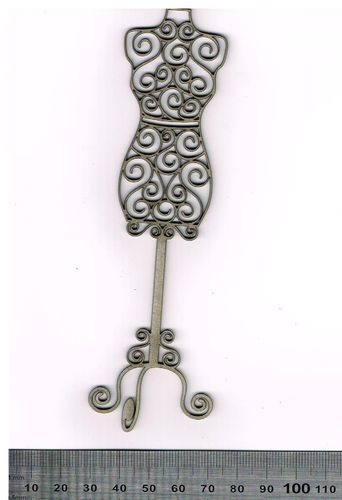
I used a gorgeous Small Dressform chipboard from Molossi  for this layout, painting it in a lovely cream. I used it as the basis of my flower cluster, adding lots of sewing themed detail around it.


I finished off the layout by adding my long winded title: "Making Costumes for Alice...in Wonderland!".

Small Dress Form


Photobucket

Friday 21 March 2014

REUSE OR MAYBE ITS A CASE OF HOARDING

Good morning all... Rikki here on this fine Friday. Today I thought I would share with you a mixed media layout that uses your plastic bags from when you buy your lovely Manorhouse Creations flowers.... now you wont be throwing them out!!! Keep them and reuse them. 

Mind you might want to keep it a secret from the other halves in our lives, because I think mine thought I was off my trolley when I was telling him not to throw out the empty packaging. That or he thought I would need to go on Hoards, officially now, I could just see his brain tick over.... ''you have enough scrapbooking supplies, why are you using the plastic bags?" 

Ahhhh, that I do but little does he know..... lol.


Where to start? I usually start with a little bit of  
Derivan Paints & Mediums Gesso, swiped over the background where I want my mists to go (I just use whats on my desk..... usually the backing from my flowers). Allow to dry.

Now with your left over plastic packaging , brush a little bit of your mist on it.... I started off with Heidi Swapp Colourshine. Place it over your gesso and squash it down. Repeat till you get the coverage that you are after. Dont forget to flick a few spatters around and allow to dry.

Once its dry we are repeating the same technique as above with the Dylusions, while they are still wet use your Dusty Attic Mini Spritz Bottle with water, and bleed out the Dylusions a little bit you can also use your plastic bag to push it around at this stage. Allow to dry, once your happy with the results and also dont forget to flick a few spatters.


Now you can built your layout, I used some stamps just remember to use some Archival Ink Pad  so it wont run into your colours. Another great thing to use is the Kaisercraft Rubon words for an instant title.


Gesso 500ml
Gesso 500ml
Dylusions Ink Spray - Calypso Teal
Mini Spritz Bottles
Mini Spritz Bottles
Archival Ink Pad - Jet Black
Explore Rubon Word
Explore Rubon Word
Also another product that I a secretly excited about in the store is the new 12x12 Bazzill Card Shoppe Cardstock 250gsm, it is perfect of those of us who love mixed media and not the buckling that happens when we create our backgrounds. Why dont you pop over to the store and see the stunning colours it comes in and grab yourself some today.

I hope that has inspired you to keep and reuse your left over packaging.... if you give this a go it would be great if your could share a link in the comments and the team will go and have a look.

Till next week I hope you have a great creative weekend.

Rikki
xxx
Photobucket

Wednesday 19 March 2014

EASTER PHOTO CAROUSEL BY DANA


Hi! Dana Tatar here today sharing an Easter themed home decor piece. I started with a Dusty Attic Photo Carousel and embellished it with colorful patterned paper, Manor House Creations Flowers, Molossi Sticky Bling and some Easter decorations.


This is what the Dusty Attic Photo Carousel looks like assembled and unaltered. The entire piece spins 360 degrees. The two lattice pieces are stationary. The four solid panels (two are shown above) spin 360 degress.


I colored the top and bottom pieces with Vintage Photo Distress Stain. When I think about Easter, the first things that come to mind are white bonnets and baskets, so I colored the two lattice pieces with a White Acrylic Paint Dabber. I set these pieces aside to dry overnight. Note: I left the 4 spinning panels natural because they will be covered with patterned paper.


I colored some Manor House Creations Teeny Weenies Roses with Bubblegum Pink, London Blue, Lemon Zest and Vibrant Turquoise Dylusions Ink Spray.


I cut patterned paper to fit the rotating panels. I embellished 4 panels with photos of my daughters and 4 panels with vintage Easter themed clip art. I added Manor House Creations Flowers and some Easter themed embellishments from my personal stash. I finished each patterned panel with stitching and and a Viva Decor Creme Pearl Pen.


Here are the four photo panels on the assembled carousel.


Rotating each panel 180 degrees reveals the vintage clip art.


Here's a closer look at the floral clusters. The Manor House Creations Flowers in pink and purple are unaltered. The smaller yellow, pink, blue and turquoise roses are the Manor House Creations Teeny Weenie flowers that I colored with Dylusions Ink Spray.


I embellished the white lattice pieces with Manor House Creations Flowers, vine die-cuts, and a triple loop bow. Each intersecting piece of lattice is adorned with a piece of Molossi Sticky Bling.


I had a lot of fun embellishing the top piece of this carousel! This carousel is very strong and I could have piled on a lot more weight without effecting the rotational capability of this piece. I laid down a nice blanket of artificial grass and topped that with eggs, flowers, bows and a resin bunny holding a basket of carrots.


Thanks so much for stopping by today! I'm proudly displaying this piece in my home until Easter, when it will be the highlight of my brunch centerpiece!

Molossi Supplies:
Dusty Attic Photo Carousel
Manor House Creations Teeny Weenie Roses - White
Manor House Creations Coordinations - Purple
Manor House Creations Layout Pack - Chic
Manor House Creations Razzles - Pink
Manor House Creations Razzles - Purple
Manor House Creations Vine - White
Manor House Creations Peacock Feather - Pink
Manor House Creations Peacock Feather - Purple
Manor House Creations Lace Butterflies and Hearts
Sticky Bling - Rainbow
Sticky Bling - Lilac
Sticky Bling - Hot Pink
Viva Decor Pearl Pen - Creme
Vintage Photo Distress Ink Pad
Vintage Photo Distress Stain
Dylusions Ink Spray - Bubblegum Pink
Dylusions Ink Spray - Lemon Zest
Dylusions Ink Spray - London Blue
Dylusions Ink Spray - Vibrant Turquoise


Photobucket

Monday 17 March 2014

A GIFT FROM ABOVE LAYOUT BY CATHI


This week I have a layout to share using some gorgeous Molossi chipboard, the Fleur de Lis and the Gift From Above wording.


I used gorgeous new Blue Fern Studios Garden papers, lots of mists, molding paste and a Finnabair checkerboard stencil. I layered lots of paper, used some gorgeous Prima and Petaloo flowers and of course had to use some Molossi chipboard and my favorite script stamp.


I love how this turned out and hope you do too!! 

Thanks so much for stopping by!!


Photobucket

Friday 14 March 2014

SHINE BRIGHT.....


Good morning.... how are you all? Rikki here with another Friday post. So now that you have seen my creative space I thought it would be a great idea to get creative and show you what you can do with a lot of flowers. 

Anyone who knows me... knows that I love flowers but not a huge amount... and when I say I don't love a huge amount its more that I haven't learnt yet how to pull off a Prima style layout. I love there layouts but it really baffles me how they can do it. So this week I decided it was time to just evoke a little bit of flower spirit.
Here you go!!! As promised a lot of flowers and I am beyond happy with the result. For a handy start point the Manor House Creations Vinette's, they are the smaller version of there large vines. the plus side of the smaller vines is you can join them together and make a larger spray of flowers.


A handy tip when you are pulling off a flower spray like this mount your photo up so you can hide all your wires from the individual flowers and vines. It also allows you to add more depth to your layers of flowers and leaves.
Mixing your packets of Manor House Creations flowers is a great way to increase your stash and change the look of your Vinette's.
One other thing I love to do is add large rhinestones in between the flowers, they hid all the extra wires, and glue that you don't want people to see.... and they act like little mirrors to reflect light .Lets face it who doesn't like a bit of bling.
Vinettes - JADE
Vinettes - JADE- 2 in a packet
*Concerto
*Concerto
Card pack - white
Card pack - white
Teeny weenies roses 36pcs
Rhinestones - Silver

I hope that has inspired you in creating a floral layout. If you do try this leave me a link in the comments so I can have a  look. Till next week, have a creative weekend.  
Rikki xxxx
Photobucket