Saturday 7 June 2014

HAPPY LAYOUT BY CATHI


This week I went for mixed media madness for my Molossi layout!! I used a lot of distress inks for this and the Molossi Number chipboard.


Lots of layers and stamping on this layout using Jet Black Archival Ink. I edged the flowers with Gold Kindy Glitz for a bit of sparkle.  


The background is full of color. I used Tumbled Glass Distress Ink for my Grunge Polka Dot stamping and Victorian Velvet Distress Ink for my Grunge Check stamping. I used lots of misting in golds pinks and blues. The Molossi Number Chipboards are inked in Black Soot Distress Ink. I had a lot of fun stamping misting and layering up this layout and I really hope you like it!!

Numbers 1 - 10 6cms High  Archival Ink Pad - Jet BlackKindy Glitz 135ML Gold
Distress Ink Pad - Tumbled Glass  Distress Ink Pad - Victorian VelvetDistress Ink Pad - Black Soot

Photobucket

Wednesday 4 June 2014

Molossi Mood Board Challenge Winner and Features!!!

We had so many great entries to our Mood Board challenge! 
So much talent out there!! The design team has voted and there can only be one winner.
Congratulations Debbie Burns!! Your canvas garnered the top votes, gorgeous take on the mood board!


Debbie, please contact cathioneill@gmail.com to arrange for your Molossi Prize Pack to be sent to you!
There were also some other projects that received strong votes from the DT and we would like to feature these :

Sarah Lynch
Michelle Kim
[IMG_8822%255B4%255D.jpg]
Wendy Smith
Please right click on the Winner or Featured badges ladies and add them to your blogs!! Congratulations!!!


Photobucket

Saturday 31 May 2014

SIMPLE JOY BY CATHI


Being out in the garden with the girls is a pleasure for us. We don't have great green fingers but enjoy growing a small amount of vegetables each year in the back garden and the girls love to help. Here they are picking lettuce leaves for a salad.... I thought these Darkroom Door Bright Blossoms Photochips fit my theme perfectly. I cut out several images and layered them under my photo. 


I used the gorgeous Molossi Fenced Birdhouse, embossing it with dark orange and yellow embossing powder for a mottled effect.


I have added mesh tape, and lots of misting and masking as well.  I really enjoyed using my mixed media goodies to make this, even though I had to add one 3D flower to the mix as well!! Thanks so much for looking!!!


Fenced Birdhouses  Photochips - Bright Blossoms

Photobucket

Monday 26 May 2014

LIVE THE LIFE YOU IMAGINED BY CATHI


Hi Cathi here with another layout for Molossi! This time I took some unusal colors for a sea themed layout and had fun with them, featuring Molossi chipboard, Manor House Flowers and Ranger Distress Ink.


Here you can see my gorgeous Molossi Banner Chipboard, simple but such a great effect on the layout, great feeling of movement you can get with these. I used Ranger Distress Paint in Fired Brick, edging it with my Derivan Low Viscosity Gesso.  I embossed the flourish stamp using Ranger Black Soot Distress Embossing Powder and stamped the script stamp using Black Soot Distress Ink.


The gorgeous flowers I used are the flowers from the Manorhouse Creations Razzles Card Pack. I finished off the layout with some shells and twine from my stash. Molossi carries some amazing products in their shop, hope you will come stop by and have a look!!


Low Viscosity Gesso 500mlDistress Paint - Fired Brick
Distress Ink Pad - Black Soot  Razzles Card pack - Red


Photobucket

Sunday 25 May 2014

CUPID CARD BY SARA

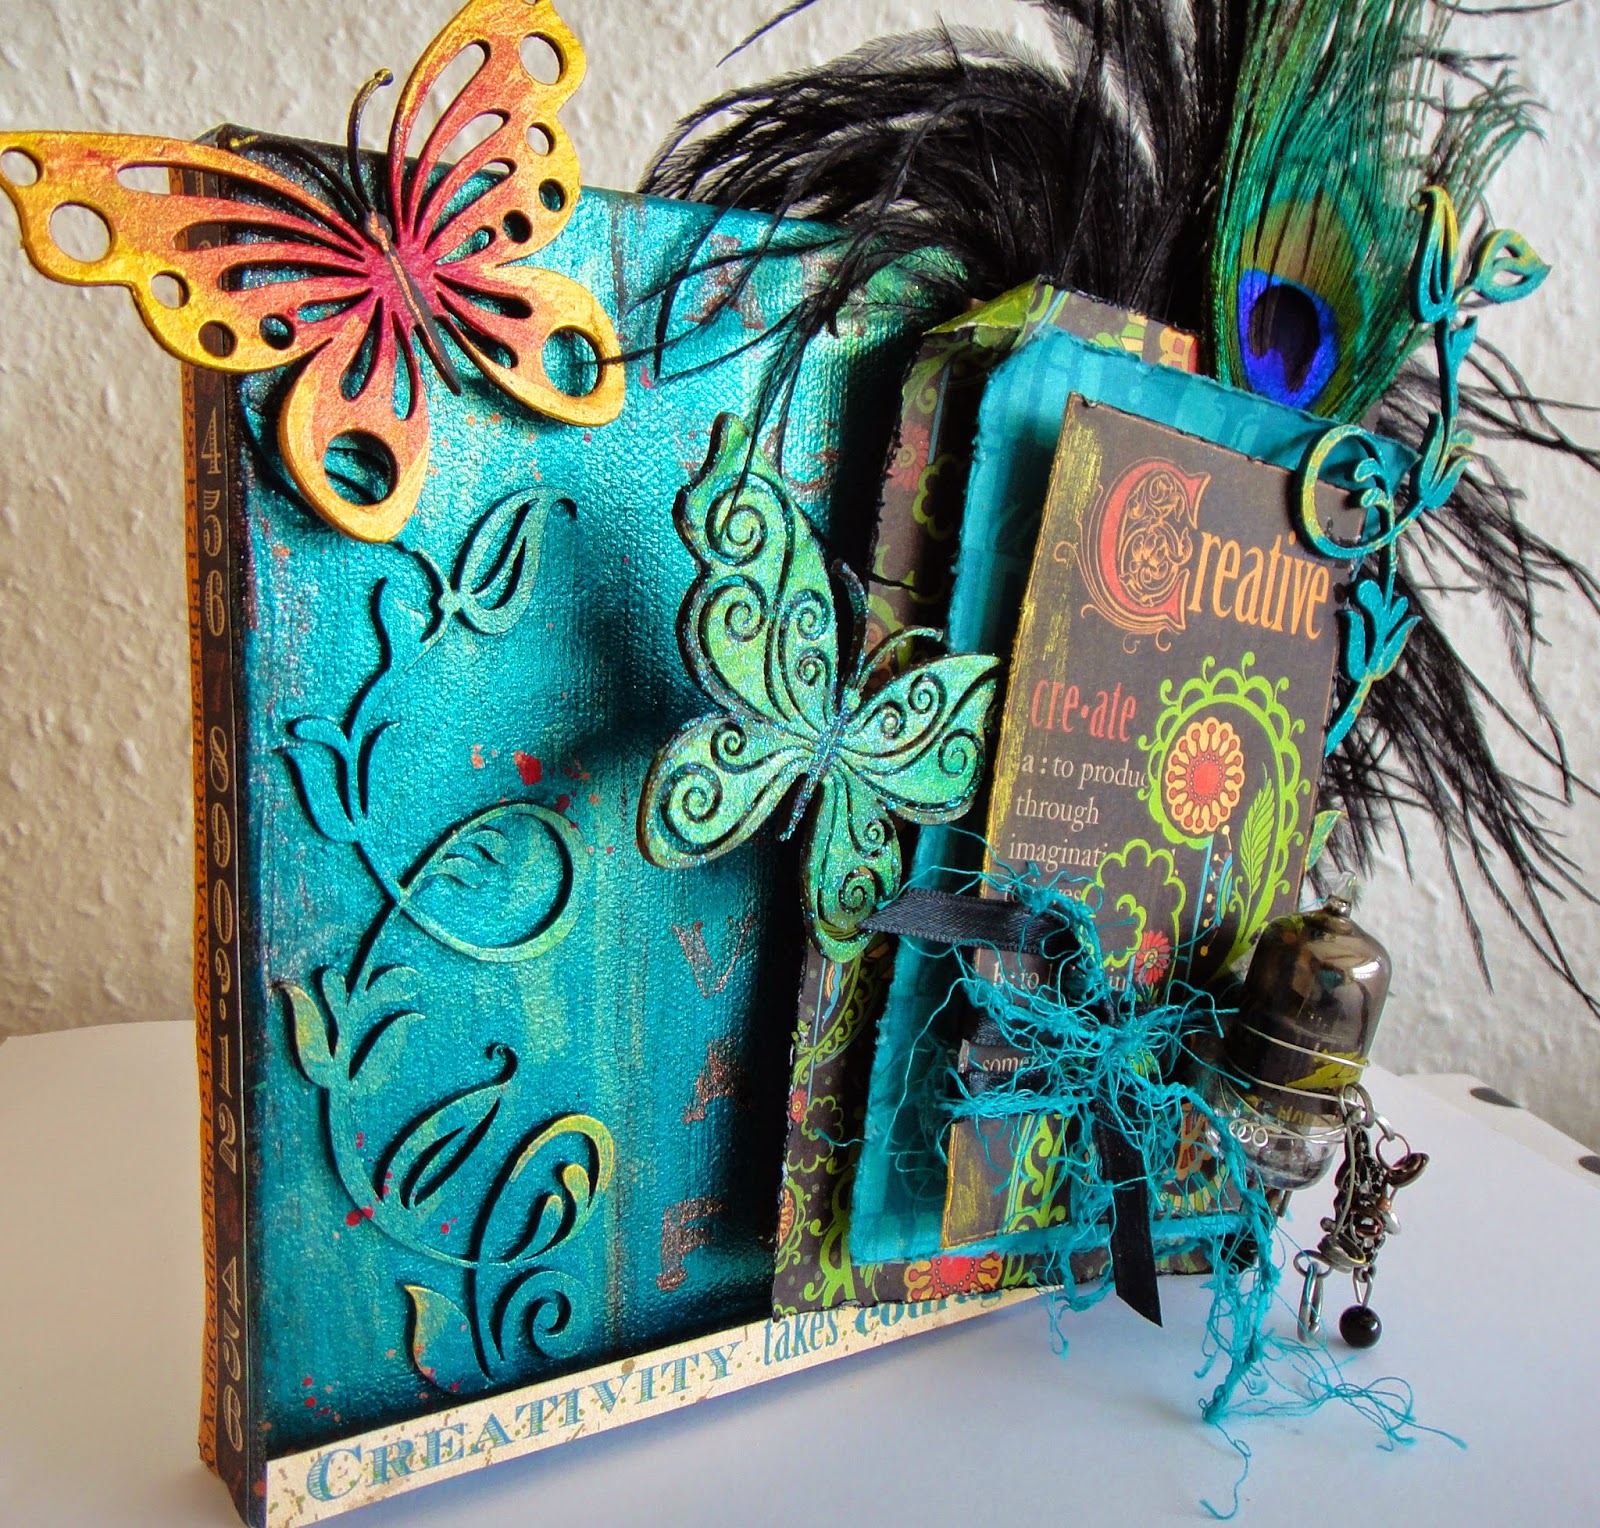
Hey guys its Sara again and today I wanted to share my third Design Team Project for this month for Molossi Chipboard... When I first started I stuck to cards and that's where my confidence grew as time as gone on I have progressed into all types of crafting... I have created this shabby chic card and a little tutorial below... I used one of the new collections from Kaisercraft called Key to my heart..
I have layered some different diecuts so it could give some dimension to my Molossi Chipboard Cupid which is so cute..I went over this piece using some inks and glitter which just makes the piece pop...

Tutorial:

Once I was layered I realised I didn't like the masking and replaced the sheet behind with a new one... I think it over powered it... So I decided to change the background sheet.. 


On this first photo I have layered my paper which I have distressed, I then started creating some layers

I have continued my layering to give it that dimension and to make the chipboard really pop.. I have started adding my embellishments..


I have then coloured my chipboard using ink and glitter...
Adding flowers and leave diecuts... Finishing it off with some pearls and my trademark a butterfly... This is so simple to create but I love how it turned out.. Let me know what you think!!!!
 
To check out the Molossi Store:
http://www.molossi.com.au/
 
To check out the Molossi First Challenge information:
http://molossidesigns.blogspot.com.au/
 
Just Cards By Sara Facebook Page:
https://www.facebook.com/pages/Just-Cards-By-Sara/303072136454811
 
 
Photobucket


Saturday 24 May 2014

MOLOSSI MOOD BOARD CANVAS BY LEE

Hello there! I am a bit late to the game for the May Mood Board Challenge, but I wanted to share what I have created. There are a few days left in May, so get going on your projects and link-up to our challenge!


I am making my debut today on the Molossi blog with this project:


This is a small 6x6 inch canvas. I gave it a coat of paint to match that wonderful door on the Mood Board.  I also liked how the details were painted the same color as the door. I painted the Dusty Attic Swirly Vines to match the canvas. Next I stenciled the alphabet onto the canvas with Viva 3D Stamp-Paint. 

The tag on my canvas was made using the Graphic 45 Typography collection.  The edges of the papers were colored with Distress Inks in Black Soot and Tumbled Glass, and each layer was mounted with plenty of room in between to tuck in the feathers and other pieces of chipboard. The butterflies are Dusty Attic Flutterbies.  I painted them different colors and gave them different finishing treatments to set them off. Some of the detail work of the butterflies was done with Kaisercraft paint in black. The green butterfly was given a coat of Viva Glitter Paste for some sparkle. The red butterfly's edges were rubbed with Viva Inka-Gold in gold. I also accented some other areas of the canvas with the gold.  

The second vine chipboard, ribbon, fiber, metal bits and vacuum tube were added to the tag.  On the bottom of the canvas I added the quote "Creativity takes courage," by Henri Matisse.  Go be brave and creative! 


The following products can be found in Molossi's online store:


Thanks for stopping by and have a great day!


Photobucket